In the previous parts of our blog series, we discussed about receiving your solar proposal, documentation and the types of permits. Here is the final part of a five-part ‘Personal Guide to Installing Solar at Home’ series. This article will be covering the installation process, as well as the warranties and maintenance.
Step 9: Installation
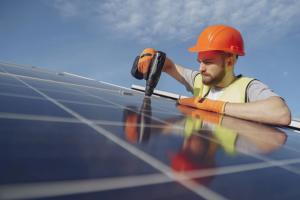
Once you’re done with confirming the proposal , site visits, permit work and planning, the actual rooftop solar panel installation will only take a few days of work. If you are installing an on-grid system with net metering, the process will take additional time. While the decision process for rooftop solar panel installation can take a while, the installation time frame is quick and simple. The actual day when your rooftop solar panel installation starts will be exciting.
1) Set-Up
The solar installer you chose will start by preparing your roof and ensuring the shingles or tiles are attached correctly. They will set up a temporary structure used to support the work crew and materials to help in the process. It helps to take care of safety during the whole rooftop solar panel installation process.
2) Solar Panel Mounts
Then, the installer will set up the solar panel mounting system. It will support the base of the solar modules. It’s the only piece of equipment which is attached to your roof. The entire mounting arrangement must have a tilt and have an angle between eighteen to thirty-six degrees to have most sunlight exposure.
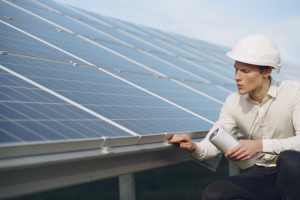
3) Solar Panel Installation
After the installer sets up the mounts, the solar module itself has to be installed on the mounting structure. They should make sure to tighten up all the bolts and nuts so that it stays firm and steady. The panels are mounted on the racking when they are firmly connected to the racking.
4) Wiring
Then, they put in electrical wiring that will connect to your electrical panel and the general power system. MC4 connectors are predominantly used as wiring for solar modules. During the wiring installation, the company must ensure that the electricity supply from the grid to home is turned off .
5) Solar Inverter
Once the electrical wiring is done, the installer should link the solar inverter to the system. The inverter(s) are connected to the modules to convert direct current (DC) into alternating current (AC) energy which is used in households and on the grid. The solar inverter may be used indoors or outdoors and is normally placed near the main system.
Inverters stored in a spot that is not too hot are often more efficient. If kept outside, the inverter should be kept out from the afternoon sun. If installed indoors, the garage or utility room is typically the most reliable location as they remain cool for most of the year with ventilation.
6) Solar Battery
If you opt for an off-grid solar system, a battery is necessary since it is used to store backup power ,which is connected with the solar inverter.
7) Grid Connection
To link the inverter to the grid, the installer will have to simply plug it in the main power switchboard, so that it receives power from the grid. The output wire should also be connected with a board that is supplying electricity at home. To determine the excess energy generated from the solar system, the installer needs to install a metering device.
The installation time will range from 1 to 3 days, subject to the size of the system you are installing. Net-metering can add time to your installation process . If your installer needs to add a power meter for net-metering, it might add a few hours to your solar installation.
8) Consumer Unit
The inverter should be linked to the consumer unit (known as the distribution or fuse board) to generate electricity. To observe the amount of electricity the solar modules generate, a generation meter should also be connected . To evaluate your solar systems’ performance, you can check on the HomeScapes’ remote monitoring app.
For instance, you can check the electricity generation data and decide the appropriate time for using your dryer or other utilities. It will also show the import and export of the power happening due to the net-meter.
Step 10: Warranty and Maintenance
Warranty
The final step with significant aspect is the warranty of the solar power system. Warranties for solar panels protect your solar investment and are an integral part of any rooftop solar panel installation. There are two kinds of warranties that keep your modules covered, and knowing the differences between them is vital to make sure you get the most suitable agreement for your solar energy system.
The two types of warranties are:
- Product (or materials) warranty
- The performance warranty
A product warranty of solar modules covers the panel itself and guards you against obstacles like manufacturing defects, environmental issues and unanticipated wear & tear. A material warranty will typically guarantee 10 to 12 years without the modules failing.
The performance warranty will ensure 90% production at ten years and 80% at twenty-five years. As with most guarantees, more the period, the more it is advantageous to you. The solar inverters come with a 5 year warranty which can be increased by AMC (Annual Maintenance Contract).
Warranties, are a very confusing topic for some solar owners. However, there is nothing to worry as HomeScape provides hassle-free warranty management. We have AMC packages which cover up to the lifetime of the product. You can buy it to safeguard your whole solar system. We present the best-in-class warranty on all parts. In case of failures, you can contact us without having to run to the manufacturer.
Maintenance
As opposed to many other technologies generating power, solar photovoltaic systems have low maintenance and service requirements. However, proper upkeep of a solar plant is necessary to optimize energy yield and maximize the life of the system. Some of the maintenance activities include module cleaning once in 15 days (dust, bird dropping, and other debris can cause a decrease in power generation).

The other items to take care of include::
- Checking module connection integrity
- Checking junction/string combiner boxes
- Inspecting mechanical integrity of mounting structures
- Vegetation control
- Tightening cable connections that have loosened
- Replacing blown fuses
- Repairing equipment damaged during module cleaning or intruders.
Homescape Remote Monitoring System:
At HomeScape, we have designed an RMS (Remote Monitoring System) called HomeScape Solar, which is IoT based, to keep a record of the performance of your solar plant. The application can be found in Android and iOS.
It helps with the following functions:
- Notification alarm– If the plant, inverter or any component is not working properly, the HomeScape Solar app sends you a notification.
- Various plant parameters – Solar energy generation, solar energy consumption, units fed back to the grid, savings and contribution to the environment can be viewed.
- Plant performance– The performance of the solar system can be seen at different time scales: daily, monthly, annually or between any pair of dates.
- String monitoring– You will be able to take a look at all the parts of the system with the help of our app.
In essence, we highlighted how the solar system installation takes place starting from setting up, installing the mounts, solar panels, wiring, inverters, batteries, connection to the grid and consumer unit. We have also discussed about the significance of solar warranties and upkeep. Many of the solar companies, including HomeScape, offer a warranty on solar panels as long as 25 years.
With this article, we conclude our ‘Personal Guide to Installing Solar at Home’ series. It is now time for you to switch to the most eco-friendly option by installing solar systems for rooftops for power generation and use!
Save your money and help the world as well. Be prepared for a world which will soon switch to solar power!
Read about previous parts of the five-part series here:
Part 1- https://homescape.solar/personal-guide-to-install-solar-at-home-part-1-system-type/
Part 2- https://homescape.solar/personal-guide-to-install-solar-at-home-part-2-system-type-and-budgeting/
Part 3- https://homescape.solar/personal-guide-to-install-solar-at-home-part-3-choosing-the-solar-installation-company-and-site-survey/
Part 4- https://homescape.solar/personal-guide-to-install-solar-at-home-part-4-proposal-and-documentation/