Residential solar residential solar energy Solar Schemes

How does the Simplified Rooftop Scheme by MNRE impact you?

8 min read | By admin

Switching to Solar has become simpler with the new rooftop solar installation scheme update by MNRE.

In the recent announcement, The Ministry of New and Renewable Energy has simplified solar transition for residential consumers with a revamped solar subsidy scheme. So far, households could only take advantage of subsidy schemes for rooftop solar in India, when the system was installed by MNRE-authorized vendors.

However, the new simplified procedure will give residential solar consumers the liberty to put up their rooftop solar plant by themselves or through any solar expert of their choice and directly receive subsidy credit in their accounts in just a month. This positive development is expected to spur growth in rooftop solar adoption, as more and more household customers realize improved financial viability and affordability of solar under this program.

MNRE: The New Simplified Rooftop Scheme

The MNRE’s new simplified rooftop scheme will make solar more accessible, as the government rolls out conducive policies and regulatory frameworks. Individual solar buyers will have the freedom to select equipment like solar panels and inverters from the list of manufacturers. You won’t need to seek approval for your home solar system from the empaneled partners and can choose any rooftop solar company in India to install your solar system unit. This will give a level playing field to all the solar providers, as customers would choose providers based on their credibility.

After installing solar panels, the beneficiary just needs to notify their local DISCOM (distribution company) about the installation, to initiate the subsidy disbursement process. Another significant change is that the buyer will directly receive the subsidy payout within 30 days from installation in their own accounts rather than the installers’, which was the case earlier.

How to Claim Rooftop Solar Subsidy in India

The new simplified procedure will require the beneficiaries to register themselves on the national portal, which is expected to be launched within 6-8 weeks. The same portal will be used for the online tracking and approval of these applications. The ministry also plans to have a similar portal to operate at the DISCOM level and be linked to the national portal.

Under this revised mechanism, a household beneficiary who wishes to switch to solar electricity will apply on the national portal. The beneficiary will provide relevant information about the intended rooftop solar plant installation and bank account details to receive the subsidy amount.

The completed application will be pushed to the concerned local DISCOM and shown on the respective DISCOM portal. The DISCOM will evaluate the technical feasibility of the solar installation and issue approval within 15 working days.

After approval, you can select the rooftop solar panel installation vendor of your choice. However, you must select solar PV modules that meet the DCR (domestic content requirement), and the manufacturers should be enlisted under ALMM (approved list of models and manufacturers). Likewise, go for a J3IS-certified inverter.

The approved application also sets a deadline by which the installation must be completed, or the application will be cancelled. Consumers will then have to re-apply via the same process.

After the installation, the beneficiary applies for net metering via the national portal. The concerned DISCOM handling your application ensures the installation of net metering wherein the liability of procuring the net meter will befall upon the DISCOM company or the beneficiary himself. The related announcements will also be updated on the portal.

Lastly, the DISCOM officer will prepare a commission and inspection report, visible on both portals. A positive report will allow the transfer of the subsidy amount to your account.

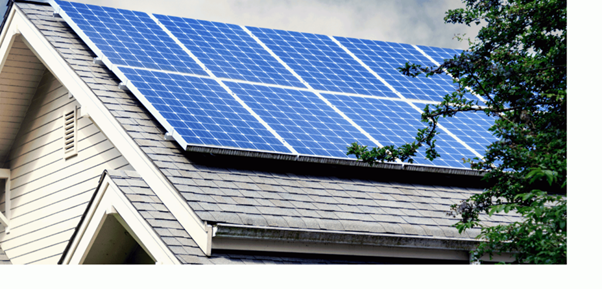
The Right Time to Get Rooftop Solar

The MNRE aims to ensure solar efficiency, quality, and ongoing post-installation service for all consumers adopting solar under the new program. To that end, a set of standards and specifications will regulate rooftop solar panel systems for homes. The program will also define the format of agreement binding upon the beneficiary and the vendor. It will outline provisions, among other terms and conditions, to ensure that the rooftop solar (RTS) plant installed ticks off all safety and performance standards and mandates the solar installation companies to maintain the installed system for at least 5 years or more as specified in the agreement.

The ministry will also ensure stringent application process monitoring and define a grievance redressal mechanism to resolve customer complaints.

Under the new rooftop solar program, the government is subsidizing solar and also ensuring that you get the best value for the investment that you are going to make. Trust HomeScape by Amplus Solar to help you get the full benefit of the simplified rooftop solar scheme. As a leading residential rooftop solar company in India, we have the best rooftop solution composed of top-quality panels bi-facial solar modules, invertors, and other components.

Contact us for a consultation today.

residential solar energy residential solar systems solar for home solar power installation

How Cost-effective is it to install solar at home the Long Run?

11 min read | By admin

A residential solar energy system is a smart investment that comes with the promise of guaranteed long-term savings. Despite the high upfront cost, the expenditure or you may call it an investment is offset in just the initial few years through sizable energy output, significant net cost savings, and a hassle-free maintenance experience. In addition to being a clean, renewable source of energy that eliminates carbon footprint, solar energy is actually getting more affordable and rewarding than you think.

Cost of Installing a Solar Panel at Home

The average cost of a residential solar panel installation varies from state to state in India. Several state governments are offering financial support and subsidy schemes to make the cost of rooftop solar installation affordable for as many homeowners as possible. Here is a sample of the subsidy structure by IPGCL  (Delhi DISCOM) for their last tender (May 2020) for residential rooftop solar systems. 

SOLAR SYSTEM SIZE (KW)  SUBSIDY BENCHMARK COST (BM)
1-3 40% of BM cost Rs: 37000/ kWp
3-10 20% of BM cost Rs: 32,400/ kWp
10+  Subsidy for first 10KW only Rs: 32,400/ kWp

In earlier times, a small capacity solar PV system used to be enough to power a home. In the current times, India’s domestic energy consumption per capita is increasing and we use a lot more units of electricity today than in the past. Apart from the usual home appliances that we use, we use a lot more heating and cooling devices, smart devices, electric vehicles than before.  Hence, a 3 kWp solar system generating 12 to 15 units per day is the minimum you would need to run your home efficiently. For a bungalow with 4-5 ACs or a big farmhouse, a 5KWp system or above would be a better choice.

Maintenance of Rooftop Home Solar Panel

Routine maintenance of your solar batteries and the solar PV system will allow timely detection of potential repairs, security concerns, and signs of damage. Have your solar installer inspect the system’s wiring and electricals at least once a year. The preventive maintenance would involve inspecting fittings, electrical conduits, visible electrical hardware, and ground conductors as well. You will also need to keep your glass PV solar modules clean of any dust, debris, or bird feces that may accumulate over time. Make sure to clean your PV modules with a wet cloth once a month or every fortnight if you live in dusty areas for optimum generation. Note that the solar system should be on switch off mode when you attempt self cleaning. 

Your rooftop solar system uses a kind of mild steel rack system to be mounted. Cleaning and checking the racking for signs of damage, loose hardware, and debris accumulation should be performed once every year to prevent any uprooting of solar panels from the racking during an event of extreme weather like a storm or heavy rains.

Your solar batteries also need professional maintenance to ensure efficiency and extend their life. In addition, a little upkeep done routinely will keep your batteries in good condition. During winter, your lead-acid batteries will also need a refill of distilled water every 2 to 4 weeks. Also, monitor the battery charge, and if found flooded, apply an equalization every 90 days. 

Energy Output of Solar Panel

Power output is a key factor in selecting the right residential solar panel system. Also, when installing a solar system in your home in India, the price you pay is based on the proposed solar system capacity per kilowatts. 

Calculating the accurate electricity generated by a rooftop solar PV system can be a complex math exercise, but you can estimate it yourself for your home if you know your monthly electricity bill through various solar calculators. In the Indian scenario, for every 1 KWp of solar system,  an average of 4 kWh (units) will be generated per day, accumulating to 1,400 to 1,600 kWh in a year. This estimate may differ from the actual generation as meteorological conditions affect solar power generation capacity. Many other factors like the home’s location, the orientation of the roof, solar panel efficiency, and ambient temperature affect solar energy production, which is taken into account by the solar installers when they give you the first proposal after the technical assessment or a site visit. 

Net Savings in the Long Run

The overwhelming 6-figure cost of a residential solar panel installation keeps most homeowners on the fence. Investing in rooftop solar installation also brings attractive returns and eventually the system pays for itself with the huge cost savings in the electricity bill. With a grid-connected solar system, you will not only do away with fluctuating electricity prices but can also earn electricity unit credits via net metering by sending any excess power generated back to the grid. The DISCOM will then charge you only for the net units consumed in a particular month thus reducing your electricity bill by a great extent.  

Thanks to the little maintenance and a life expectancy of 25-30 years, you can expect a payback period of just 5-7 years on most solar PV systems available in the market. The Internal Rate of Return (IRR), expressed as the percentage of return on investment (ROI), represents the rate of returns you expect to receive on your solar panel installation cost

Suppose you make an investment in buying solar for your home. This investment would not only pay for itself but you get your electricity for free after the payback period is over. With advancements in technology, PV modules of higher efficiency are being developed which gives even more savings and generation through your residential solar panel systems.

Are you searching for the best solar plant installation company in Delhi or Gurgaon to start your solar journey? Check out HomeScape by Amplus Solar to get the most out of your residential solar panel installation cost. We are empaneled by DISCOM for solar subsidy in many states which will further reduce the upfront investment for you and increase your savings. 

Our well-designed solar system produces optimum output throughout the whole year. With us, you get an end-to-end hassle free solar solution with warranty-backed components and a safe module mounting structure with branded wiring and cables for your rooftop solar panel system.

Get your solar journey started today with a quick technical assessment and a customized solar quote from our industry experts.

residential solar energy residential solar systems Rooftop Solar Solar Energy solar for home solar panels for house

Personal Guide to install solar at home: Part 5- Rooftop Solar Panel Installation, Warranty and Maintenance

14 min read | By admin

In the previous parts of our blog series, we discussed about receiving your solar proposal, documentation and the types of permits. Here is the final part of a five-part ‘Personal Guide to Installing Solar at Home’ series. This article will be covering the installation process, as well as the warranties and maintenance.

Step 9: Installation

Once you’re done with confirming the proposal , site visits, permit work and planning, the actual rooftop solar panel installation will only take a few days of work. If you are installing an on-grid system with net metering, the process will take additional time. While the decision process for rooftop solar panel installation can take a while, the installation time frame is quick and simple. The actual day when your rooftop solar panel installation starts will be exciting.

1) Set-Up

The solar installer you chose will start by preparing your roof and ensuring the shingles or tiles are attached correctly. They will set up a temporary structure used to support the work crew and materials to help in the process. It helps to take care of safety during the whole rooftop solar panel installation process.

2) Solar Panel Mounts

Then, the installer will set up the solar panel mounting system. It will support the base of the solar modules. It’s the only piece of equipment which is attached to your roof. The entire mounting arrangement must have a tilt and have an angle between eighteen to thirty-six degrees to have most sunlight exposure.

3) Solar Panel Installation

After the installer sets up the mounts, the solar module itself has to be installed on the mounting structure. They should make sure to tighten up all the bolts and nuts so that it stays firm and steady. The panels are mounted on the racking when they are firmly connected to the racking.

solar panel installation

4) Wiring

Then, they put in electrical wiring that will connect to your electrical panel and the general power system. MC4 connectors are predominantly used as wiring for solar modules. During the wiring installation, the company must ensure that the electricity supply from the grid to home is turned off .

5) Solar Inverter

Once the electrical wiring is done, the installer should link the solar inverter to the system. The inverter(s) are connected to the modules to convert direct current (DC) into alternating current (AC) energy which is used in households and on the grid. The solar inverter may be used indoors or outdoors and is normally placed near the main system.
Inverters stored in a spot that is not too hot are often more efficient. If kept outside, the inverter should be kept out from the afternoon sun. If installed indoors, the garage or utility room is typically the most reliable location as they remain cool for most of the year with ventilation.

6) Solar Battery

If you opt for an off-grid solar system, a battery is necessary since it is used to store backup power ,which is connected with the solar inverter.

7) Grid Connection

To link the inverter to the grid, the installer will have to simply plug it in the main power switchboard, so that it receives power from the grid. The output wire should also be connected with a board that is supplying electricity at home. To determine the excess energy generated from the solar system, the installer needs to install a metering device.
The installation time will range from 1 to 3 days, subject to the size of the system you are installing. Net-metering can add time to your installation process . If your installer needs to add a power meter for net-metering, it might add a few hours to your solar installation.

8) Consumer Unit

The inverter should be linked to the consumer unit (known as the distribution or fuse board) to generate electricity. To observe the amount of electricity the solar modules generate, a generation meter should also be connected . To evaluate your solar systems’ performance, you can check on the HomeScapes’ remote monitoring app.
For instance, you can check the electricity generation data and decide the appropriate time for using your dryer or other utilities. It will also show the import and export of the power happening due to the net-meter.

Step 10: Warranty and Maintenance

Warranty

The final step with significant aspect is the warranty of the solar power system. Warranties for solar panels protect your solar investment and are an integral part of any rooftop solar panel installation. There are two kinds of warranties that keep your modules covered, and knowing the differences between them is vital to make sure you get the most suitable agreement for your solar energy system.
The two types of warranties are:

  1. Product (or materials) warranty
  2. The performance warranty

A product warranty of solar modules covers the panel itself and guards you against obstacles like manufacturing defects, environmental issues and unanticipated wear & tear. A material warranty will typically guarantee 10 to 12 years without the modules failing.
The performance warranty will ensure 90% production at ten years and 80% at twenty-five years. As with most guarantees, more the period, the more it is advantageous to you. The solar inverters come with a 5 year warranty which can be increased by AMC (Annual Maintenance Contract).
Warranties, are a very confusing topic for some solar owners. However, there is nothing to worry as HomeScape provides hassle-free warranty management. We have AMC packages which cover up to the lifetime of the product. You can buy it to safeguard your whole solar system. We present the best-in-class warranty on all parts. In case of failures, you can contact us without having to run to the manufacturer.

Maintenance

As opposed to many other technologies generating power, solar photovoltaic systems have low maintenance and service requirements. However, proper upkeep of a solar plant is necessary to optimize energy yield and maximize the life of the system. Some of the maintenance activities include module cleaning once in 15 days (dust, bird dropping, and other debris can cause a decrease in power generation).

Maintenance activities

The other items to take care of include::
  • Checking module connection integrity
  • Checking junction/string combiner boxes
  • Inspecting mechanical integrity of mounting structures
  • Vegetation control
  • Tightening cable connections that have loosened
  • Replacing blown fuses
  • Repairing equipment damaged during module cleaning or intruders.

Maintenance activities

Homescape Remote Monitoring System:

At HomeScape, we have designed an RMS (Remote Monitoring System) called HomeScape Solar, which is IoT based, to keep a record of the performance of your solar plant. The application can be found in Android and iOS.
It helps with the following functions:

  • Notification alarm– If the plant, inverter or any component is not working properly, the HomeScape Solar app sends you a notification.
  • Various plant parameters – Solar energy generation, solar energy consumption, units fed back to the grid, savings and contribution to the environment can be viewed.
  • Plant performance– The performance of the solar system can be seen at different time scales: daily, monthly, annually or between any pair of dates.
  • String monitoring– You will be able to take a look at all the parts of the system with the help of our app.

In essence, we highlighted how the solar system installation takes place starting from setting up, installing the mounts, solar panels, wiring, inverters, batteries, connection to the grid and consumer unit. We have also discussed about the significance of solar warranties and upkeep. Many of the solar companies, including HomeScape, offer a warranty on solar panels as long as 25 years.
With this article, we conclude our ‘Personal Guide to Installing Solar at Home’ series. It is now time for you to switch to the most eco-friendly option by installing solar systems for rooftops for power generation and use!
Save your money and help the world as well. Be prepared for a world which will soon switch to solar power!

Read about previous parts of the five-part series here:
Part 1- https://homescape.solar/personal-guide-to-install-solar-at-home-part-1-system-type/
Part 2- https://homescape.solar/personal-guide-to-install-solar-at-home-part-2-system-type-and-budgeting/
Part 3- https://homescape.solar/personal-guide-to-install-solar-at-home-part-3-choosing-the-solar-installation-company-and-site-survey/
Part 4- https://homescape.solar/personal-guide-to-install-solar-at-home-part-4-proposal-and-documentation/

residential solar energy Rooftop Solar Solar Energy Uncategorized

Personal Guide to Install Solar at Home: Part 2 – System Type and Budgeting

10 min read | By admin

In the first instalment of our ‘Personal Guide to Installing Solar at Home’ series, we covered the initial steps needed to Go Solar. We delved on how to weigh your choices and check how much energy your home consumes, to help with the solar system installation process. Here is the second part of the five-part series on your personal guide to installing solar at home.

Nearly any roof is appropriate for solar use with emerging technologies, barring any restrictions the infrastructure imposes. It’s a matter of which solar technology better suits the home. In the second article, we will cover the type of solar panel installation you could choose from, and metrics for determining your budget.

Step 3: Grid-Connected vs Off-Grid vs Hybrid

Grid-Connected Systems

On-grid or grid-connected solar installations are the most popular and commonly deployed in residences. These systems do not require batteries and are connected to the public electricity grid, using either solar inverters or micro-inverters. Any surplus solar energy you produce is added to the electricity grid. The electricity exported is compensated by a feed-in tariff (FiT) or credits. If the photovoltaic panels do not generate enough electricity to meet your consumption needs, the difference will be sourced automatically from the grid.

Advantages

1) Virtual battery

The electric power grid is indeed a battery in many respects, with little need for upgrades or repairs and comparatively better efficiency values. In other words, with traditional battery systems, more electricity gets lost.

2) Save money with the help of net-metering

Most of the times, photovoltaic systems produce more electricity than you can use. House owners could transfer this extra electricity into the power grid with the help of net metering, rather than storing it in batteries. Net metering is a process for billing which credits owners of solar energy systems for the electricity they contribute to the grid.

For instance, a residential homeowner has a photovoltaic system on his rooftop, during the daytime, the system produces more power than his home requires.In that case, the electricity meter will operate backwards if the home is net-metered. It offers a credit against what energy is used at nighttime or other times where the electricity consumption of the home exceeds the output of the system. Then, the customer is charged only for the use of ‘net’ electricity. From a financial perspective, without net metering, rooftop solar costs will be less feasible. Some utilities are dedicated to purchasing power from customers at the same price they sell it.

Off-Grid Systems

An off-grid system is not linked to the electricity grid. Hence, battery storage is necessary.

Advantages

1) Access to electricity

In some locations, where there is no access to the grid, off-grid solar panels can be a better option, rather than extending power lines. Through off-grid solar systems, residents who live in places disconnected from the grid can save money. These systems make it possible that consumers do not have to pay extra to connect to the grid. It offers individuals the right to live anywhere and being able to generate and manage electricity.

2) Self-sufficient electricity production

Without any notice, power outages can spring up. Losing control means going without electricity, which can be a short-term problem and an exceedingly frustrating long-term interruption. A power failure can always be over as soon as it occurs, but the lack of energy will often last longer. Many times, depending on the origin of the outages and the amount of time it takes to resume service, it can continue for a day or even weeks.

Power failures in the utility grid do not harm off-grid solar installations.   As these devices store electricity and are still ready for future crises, off-grid solar energy systems are useful during blackout scenarios. In the wake of any possible incidents, a household with an off-grid solar photovoltaic system could continue to have electricity.

Hybrid Systems

Hybrid solar systems incorporate the best solar technologies from grid-tied and off-grid. These systems can be represented either as off-grid solar with utility backup capacity, or grid-tied solar with additional storage of batteries.

Advantages

1) Less costly compared to off-grid solar systems

Hybrid solar structures are less costly than off-grid systems since you do not need a backup generator. The battery bank’s power can be downsized.

2) Smart solar has a bright future

Hybrid solar systems have started opening for many exciting developments. New inverters allow residents to reap the benefits of differences in the utility electricity prices throughout the day with the help of the battery storage systems.

Step 4: Determine your Budget

Think about the following points while budgeting for your solar system:

  • Like we stated in the first part of this guide series, you might have to estimate the load and determine the type of system that suits your requirements. After doing this, you would be able to estimate how much the installation of a solar system at your home would cost you.
  • Calculate your earnings and your expenditures, your expectations and your preferences, and determine the amount of money that you should potentially set together for your residential investment which can give you returns upto 30% with a payback period of 4-5 years.
  • Other than your personal goals, your professional solar contractor will help you assess what your project might look like. Reach out to HomeScape to help you with all your solar installation needs.

In conclusion, the second part of our personal guide series talked about the type of systems you could get (Grid-Connected vs Off-Grid vs Hybrid) and the points you should keep in mind while budgeting for your solar system. Since 2010, the cost of photovoltaic solar energy has reduced by 82 per cent. So, this would be the right time to consider purchasing a rooftop solar system. Watch out this space for the next part of our blog series on your Personal Guide to Installing Solar at Home.

Read about Part-1 of the Five-part series – https://homescape.solar/personal-guide-to-install-solar-at-home-part-1-system-type/

© Copyright 2021. All Rights Reserved. Amplus Solar