If you have been wondering about installing solar panels, then there’s no better time than now to do so. The price of solar panels, and hence solar PV systems has significantly decreased. Getting solar panels for house nowadays is a lot economical and convenient than before.
How can you install a solar plant on your rooftop?
Here are ten simple steps for the installation of a solar photovoltaic system on your rooftop:
1) Evaluate your options
There are a few points to remember and take account of before installing solar panels on homes.
- Do you have space for installing solar panels on your rooftop? How much is it?
- Will the sun shine bright on your space during hours of daylight?
- Is your roof structurally strong enough to support solar panels and their structure weight?
- How much of the area is covered by shade?
- What type of solar panel for the house you would like to install (monocrystalline, polycrystalline, thin-film, bifacial, PERC)?
2) Load calculation and energy audit
How much energy does your home consume?
Now that you’ve weighed your choices, the next move is to determine how much electricity you would require after installing a solar plant at your home. Calculate the following with the help of our simple DIY calculation guide:
- Solar System Capacity
- Area requirement for Your Solar System
- Payback Period for Your Solar System
Estimate how much electricity the solar panel for house needs to generate with the help of an energy audit. Energy audits, in general, helps you to:
- Reduce your monthly energy bill by doing away with excessive use
- Decide how much solar energy you require
- Meet a crucial condition for some tax credits, rebates, and loans
3) Grid-Connected vs Off-Grid vs Hybrid
A grid-connected system is a type of installation where solar panels are linked to the electrical grid. Solar energy thus produced is used. If your solar plant does not produce enough electricity to satisfy the consumption requirements, the difference will be automatically sourced from the grid. An off-grid system is not linked to the power grid. Hence, battery storage is necessary. A hybrid system integrates solar and battery storage in one, and are now accessible in various setups and forms.
4) Estimate your budget
After calculating and determining what kind of solution suits your optimal rooftop solar design specifications, you can quickly estimate how much the process of installing a solar panel at the house would cost you with the help of solar calculators available on the MNRE website. Make sure to consider maintenance costs, warranty, and the lifetime of the system.
5) Choose your solar developer
Once you have your budget fixed, it is time to identify a trustworthy solar company. We would advise you to do your research for the solar company you want to get a solar plant from because it is a product for a lifetime, and you would not want to run everywhere in case of a breakdown. Do check product warranties. HomeScape by Amplus is a trusted brand from the house of the PETRONAS group brought to you by a creative group of solar designers and experts. HomeScape provides you 25 years performance warranty* along with the product insurance to protect you from any anomaly in the plant in the future.
6) Site Survey
The site survey is required for a solar developer to evaluate:
- Best photovoltaic location
- Obstacles (if any shading)
- Size of the central electrical panel inside the household
- Places suitable for installation of the electrical elements
- State of the Rooftop (structurally sound or not)
- Square footage suitable for positioning module
To assess your home, the executives from a solar company will take a note of the following points:
- Overall roof size
- Slope angle
- Chimney and vents
- Compass orientation of the rooftop slope
- Roof thickness
- Strong trees or other blockages in or around the residential property
7) Receive your proposal
After finishing your site survey and measuring the average kilowatt-hour consumption of the building, you will receive a proposal from your solar company. Evaluate and pick a solar plant that suits your requirements, both technically and economically.

8) Documentation and permits
Like every significant financial move, there is a lot of documentation involved with rooftop solar panels for the house. For on-grid networks, permits are needed, when you would like to opt for net metering or gross metering. Typically, permits differ from state to state and depend on the form and scale of construction of solar panels. HomeScape takes care of all the documentation processes making it hassle-free for customers. Regardless, it is still a smart thing to know and understand what is happening with your solar power plant.
9) Installation
Solar Panels: The solar developer will begin by preparing the rooftop. It would make sure that the panels are fixed correctly. Electrical Wiring: The solar company then installs electrical wiring, which would connect to your electrical panel and main power system.

10) Warranty and maintenance
Generally, solar plant for houses come with a twenty-five years warranty. The company would offer ten years for 90 percent and the following fifteen years for 80 percent performance. The inverters usually come with a five-year warranty which can be extended by AMC, if required.

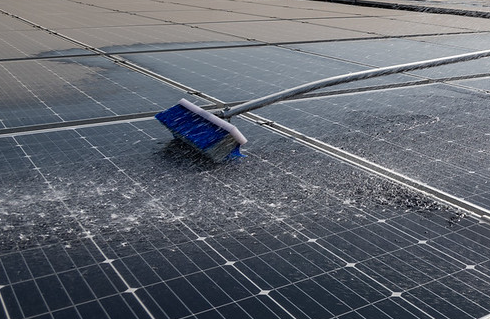
our solar plant does not require that much upkeep but taking care of a few aspects is necessary. Cleaning the photovoltaic panels is crucial for an efficient generation. Periodic cleaning of the modules (once in fifteen days) with wet cloth or wiper stick is sufficient for the best performance of the system. In conclusion, when you are familiar with the steps of installing a solar photovoltaic system, the whole process becomes much easier. The installation of the solar panels for houses is not very difficult, nor is it incredibly costly.

